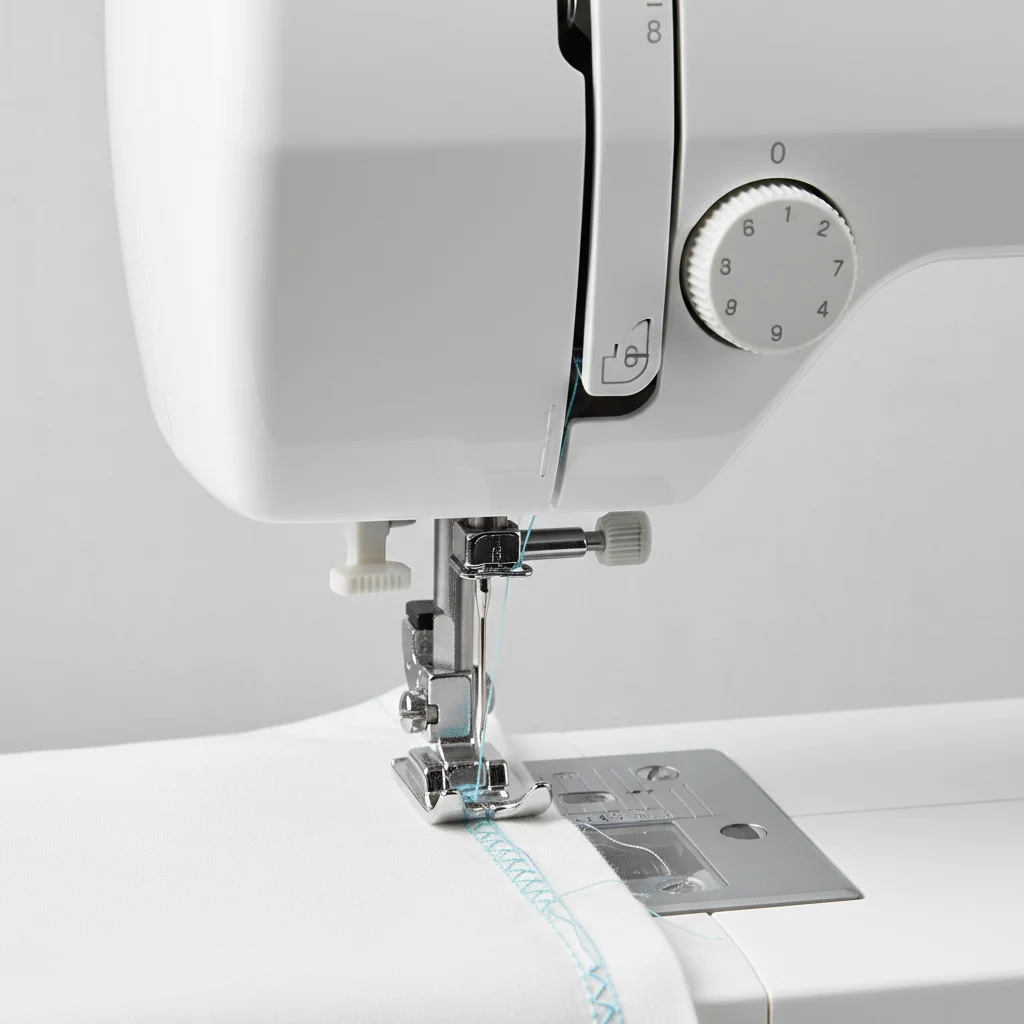
Achieving perfect stitches on a sewing machine requires mastering tension, which balances the upper and bobbin threads. Incorrect tension is a common cause of skipped stitches, puckering fabric, and loose seams. When tension is balanced, threads interlock precisely in the middle of the fabric layers, creating a neat, strong stitch. Most modern machines have a numbered dial (0-9) for upper thread tension, while bobbin tension involves a small screw on the bobbin case.
Understanding Sewing Machine Tension
Sewing machine tension refers to the balance between the upper thread and the bobbin thread. When the tension is perfectly balanced, the two threads interlock precisely in the middle of the fabric layers, creating a neat, strong stitch. If the upper tension is too tight, the bobbin thread will be pulled to the top of the fabric. Conversely, if the bobbin tension is too tight, the upper thread will be pulled to the underside. Recognizing these visual cues is the first step in troubleshooting. For expert sewing machine reviews on this site.
Most modern sewing machines have a numbered dial for adjusting upper thread tension, typically ranging from 0 to 9. A higher number indicates tighter tension. Bobbin tension, while less frequently adjusted, usually involves a small screw on the bobbin case itself. Always make small adjustments and test on a scrap piece of fabric.
Diagnosing Common Tension Problems
Before making any adjustments, it’s crucial to identify the specific tension issue you’re facing. Here are the three most common scenarios:
- Loose Upper Thread: Loops visible on the underside of the fabric. This indicates the upper tension is too loose or the bobbin tension is too tight.
- Loose Bobbin Thread: Loops visible on the top side of the fabric. This suggests the bobbin tension is too loose or the upper tension is too tight.
- Puckering Fabric: Often a sign that both tensions are too tight for the fabric type, or the needle size is incorrect.
- Skipped Stitches: While not always a tension issue, extreme tension imbalance can contribute to skipped stitches, alongside a dull needle or incorrect needle type.
- Uneven Stitches: Inconsistent stitch appearance can point to fluctuating tension settings or issues with thread path.
Always start by re-threading your machine completely, both upper and bobbin, as incorrect threading is a frequent cause of tension problems that aren’t actually tension-related.
Adjusting Upper Thread Tension
|
Our Picks for the Best Sewing Machine in 2026
As an Amazon Associate I earn from qualifying purchases.
|
||
| Num | Product | Action |
|---|---|---|
| 1 | Brother CS7000X Computerized Sewing and Quilting Machine, 70 Built-in Stitches, LCD Display, Wide Table, 10 Included Feet, White |

|
| 2 | Brother FB1757X Mechanical Sewing Machine |
|
| 3 | Brother Sewing and Quilting Machine, XR3774, 37 Built-in Stitches, Wide Table, 8 Included Sewing Feet |
|
| 4 | Brother RLX3817 17-Stitch Sewing Machine, White(Renewed) |
|
| 5 | SINGER Heavy Duty 4423 Meltwater Blue High Speed Sewing Machine with Accessory Kit | Strong Motor With Enhanced Piercing Power, 97 Stitch Applications, Full Metal frame, 1-step Buttonhole & LED Light |
|
| 6 | SINGER Heavy Duty 4452 High-Speed Sewing Machine with Accessory Kit | Strong Motor with Enhanced Piercing Power, 110 Stitch Applications, Full Metal Frame, 1-Step Buttonhole & LED Lights, Grey |
|
| 7 | Janome Cat Fancy Easy-to-Use Sewing Machine with Interior Metal Frame, Bobbin Diagram, Tutorial Videos, Made with Beginners in Mind!, Multi-Color |
|
| 8 | Brother XM2701 Sewing Machine, Lightweight, Full Featured, 27 Stitches, 6 Included Feet |
|
| 9 | Brother SE700 Sewing and Embroidery Machine, Wireless LAN Connected, 135 Built-in Designs, 103 Built-in Stitches, Computerized, 4" x 4" Hoop Area, 3.7" Touchscreen Display, 8 Included Feet, White |
|
| 10 | SINGER Heavy Duty 4411 High-Speed Sewing Machine with Accessory Kit | Strong Motor, Enhanced Piercing Power, 69 Stitch Applications, Full Metal Frame, 4-Step Buttonhole & LED Light, Grey |
|
The upper thread tension is the most frequently adjusted setting. Locate the tension dial on your machine, usually on the front or side. If your stitches are showing loops on the underside of the fabric (loose upper thread), increase the upper tension by turning the dial to a higher number. If your stitches are showing loops on the top side (tight upper thread), decrease the upper tension by turning the dial to a lower number. Make adjustments in small increments, typically one number at a time, and test after each change on a scrap of the fabric you’re using for your project.
Adjusting Bobbin Tension
Bobbin tension is generally set at the factory and rarely needs adjustment. However, if you’ve tried adjusting the upper tension extensively and still can’t achieve balance, you might need to tweak the bobbin tension. This usually involves a small screw on the bobbin case. For drop-in bobbins, the adjustment screw is often on the bobbin case itself, which you might need to remove. For front-loading bobbins, the screw is on the metal bobbin case. Turn the screw a quarter turn at a time. Turning clockwise tightens the tension, and counter-clockwise loosens it. Be extremely careful, as even a small turn can make a significant difference. It’s often recommended to mark the original position of the screw with a permanent marker before adjusting, so you can return to the factory setting if needed.
Tips for Maintaining Perfect Tension
Consistent tension isn’t just about adjustment; it’s also about good sewing practices. Always use good quality thread that is appropriate for your fabric and needle. Cheap or old thread can fray, stretch, or have inconsistent thickness, leading to tension issues. Ensure your machine is clean, especially around the tension discs and bobbin area, as lint and debris can interfere with thread flow. Use the correct needle size and type for your fabric; a too-large or too-small needle can affect how the thread passes through the fabric and interacts with the bobbin thread. Finally, always test your tension on a scrap of your project fabric before you begin sewing, as different fabrics and thread combinations will require slightly different settings.
When to Seek Professional Help
If you’ve meticulously followed all the troubleshooting steps—re-threading, cleaning, adjusting both upper and bobbin tension—and still can’t achieve balanced stitches, it might be time to consider professional servicing. Sometimes, internal components like springs or tension disc assemblies can wear out or become misaligned, requiring a technician’s expertise. A professional can also identify other underlying mechanical issues that might be mimicking tension problems, ensuring your machine runs smoothly for years to come.
Frequently Asked Questions
What causes loose loops on the underside of fabric when sewing?
Loose loops on the underside of the fabric typically indicate that the upper thread tension is too loose or the bobbin tension is too tight. This imbalance causes the bobbin thread to be pulled excessively to the top, leaving loops below. Re-threading the machine is often the first step to resolve this issue.
How do I know if my sewing machine's bobbin tension is too tight?
If your bobbin tension is too tight, the upper thread will be pulled to the underside of the fabric, creating visible loops or an uneven appearance on the top. This is the opposite effect of loose upper thread tension. Adjustments to bobbin tension should be made in very small increments, typically a quarter turn of the screw.
Should I adjust upper or bobbin tension first when troubleshooting?
You should always adjust the upper thread tension first, as it is the most frequently adjusted setting and often resolves most tension issues. Bobbin tension is usually factory-set and rarely requires adjustment. Only consider adjusting bobbin tension if extensive upper tension adjustments don't achieve balance.
What are common signs of incorrect sewing machine tension?
Common signs of incorrect sewing machine tension include loose loops on either the top or bottom of the fabric, puckering fabric, and sometimes skipped or uneven stitches. A perfectly balanced stitch will have the upper and bobbin threads interlocking precisely in the middle of the fabric layers.
Can poor quality thread affect sewing machine tension?
Yes, poor quality thread can significantly affect sewing machine tension. Cheap or old thread may fray, stretch, or have inconsistent thickness, which prevents smooth flow through the tension discs and needle, leading to uneven or broken stitches. Always use good quality thread appropriate for your fabric and needle.
Adjust Sewing Machine Tension for Perfect Stitches
Learn how to diagnose and adjust both upper and bobbin thread tension on your sewing machine to achieve balanced, neat stitches and prevent common sewing problems.
Examine your stitches on a scrap piece of fabric. Look for loops on the top (loose bobbin, tight upper) or bottom (loose upper, tight bobbin) of the fabric, or puckering. Re-thread both the upper and bobbin threads completely before making any adjustments, as incorrect threading is a common non-tension issue.
Locate your machine's upper tension dial, typically numbered 0-9. If loops are on the underside, increase tension by turning to a higher number. If loops are on the top side, decrease tension by turning to a lower number. Make small adjustments, one number at a time, and test after each change.
Bobbin tension is rarely adjusted, but if upper tension adjustments fail, locate the small screw on your bobbin case. Turn the screw a quarter turn clockwise to tighten or counter-clockwise to loosen. Mark the original position with a permanent marker before adjusting to easily revert to factory settings if needed.
After each adjustment, test your stitches on a scrap of the actual fabric you are using for your project. Different fabrics and thread combinations may require slightly different tension settings. Continue making small adjustments and testing until your stitches appear balanced and even.
Ensure consistent tension by using good quality thread, keeping your machine clean (especially tension discs), and using the correct needle size and type for your fabric. These practices prevent many common tension issues and contribute to smoother sewing.

Good overview, but I was hoping for a bit more detail on adjusting bobbin tension. The mention of a small screw on the bobbin case is helpful, but I’m still a little nervous about messing with it. My machine still has some skipped stitches, so I might need to find a video tutorial for that specific part. Otherwise, solid advice on upper tension.
I’ve been sewing for years, but tension has always been a bit of a mystery. The part about how threads interlock precisely in the middle of the fabric layers really helped me visualize what I’m aiming for. My projects are definitely looking better now, especially with delicate fabrics that used to pucker. Great tips!
Finally, someone explained why my fabric was puckering! I always thought it was just the fabric itself, but it was definitely my tension being too tight. The visual of the bobbin thread being pulled to the top made so much sense. My projects are looking so much more professional now, no more wavy seams!
This guide was a lifesaver! I was getting so frustrated with my stitches looking uneven, and I couldn’t figure out why. The explanation about the upper thread tension dial (0-9) really clicked for me. After adjusting it just a bit, my seams look so much cleaner and professional. Thank you for breaking it down so clearly!