Adjusting your sewing machine tension is crucial for flawless stitches, ensuring both the top and bobbin threads interlock perfectly within the fabric layers. This balance prevents common issues like uneven stitches, loops, or tangled threads. Most machines have a default tension setting, typically between 3 and 5, but adjustments are often necessary when changing fabrics or threads to maintain stitch quality.
Understanding Sewing Machine Tension
Sewing machine tension refers to the delicate balance between your machine’s top (needle) thread and its bobbin (lower) thread. Imagine it as a tug-of-war where both threads meet in the middle of your fabric layers, forming a perfectly intertwined knot. When this balance is just right, your stitches appear identical on both sides of the fabric, strong and smoothly integrated. This optimal interlock prevents issues like thread bunching, loose loops, or stitches that pull apart easily. Most machines come with a default tension setting, often ranging from 3 to 5, which serves as a good starting point for standard sewing. However, various factors can disrupt this harmony, necessitating manual adjustment to bring your stitches back into perfect alignment.
Common Signs of Incorrect Tension
Identifying tension problems early can save you a lot of frustration. Your sewing machine often tells you exactly what’s wrong through the appearance of your stitches.
If you observe loops or excess bobbin thread showing on the top side of your fabric, it usually indicates that your top thread tension is too tight or your bobbin tension is too loose. The tight top thread pulls the bobbin thread upwards, making it visible from the front of your project.
Conversely, if the needle thread is visible on the underside of the fabric, often forming loops or tangles, your top thread tension is likely too loose. In this scenario, the loose top thread is pulled down by the bobbin thread, causing it to show through on the back.
Beyond visible loops, other common indicators of tension issues include fabric puckering or gathering along the seam, which often suggests that the tension (either top or both) is excessively tight for the fabric. You might also encounter skipped stitches or frequent thread breakage, both of which can be symptoms of imbalanced tension, among other potential causes like a dull needle.
Essential Checks Before Adjusting Tension
Before you even touch your tension dial, it’s crucial to perform a few basic checks. Many “tension problems” are not actually about the tension settings themselves, but rather simple user errors or machine maintenance oversights. These preliminary steps can often resolve your stitching issues instantly.
First, re-thread your sewing machine entirely, both the top thread and the bobbin. Even a tiny misstep in the threading path, like missing a guide or not seating the thread properly between the tension discs, can drastically affect stitch quality. Always remember to thread your machine with the presser foot in the UP position; this ensures the tension discs are open and the thread can settle correctly.
Next, inspect your needle. A bent, dull, or incorrect needle for your fabric type can wreak havoc on tension. Using the right needle size and type for your fabric and thread is paramount. As a good rule of thumb, replace your needle every 6-8 hours of sewing time to ensure it remains sharp and straight.
Check your bobbin. Ensure it’s wound evenly – an irregularly wound bobbin can lead to inconsistent tension. Also, confirm it’s inserted correctly into its case according to your machine’s manual. Always use good-quality thread, and ideally, use the same brand and weight of thread for both the top and bobbin for optimal balance.
Finally, give your machine a good clean. Lint and dust can accumulate in the tension discs, the bobbin case, and other thread pathways, obstructing the smooth flow of thread and leading to tension inconsistencies. A quick clean with a small brush can often work wonders.
Step-by-Step Guide to Adjusting Upper Thread Tension
The upper thread tension dial is usually the first and most frequently adjusted component when addressing stitch issues. This dial, typically numbered from 0 to 9 or 1 to 10, controls the pressure on the top thread as it feeds through your machine.
To begin, locate the tension dial on your sewing machine. Higher numbers on the dial increase tension, making the thread tighter, while lower numbers decrease tension, making it looser. A common default setting is often around 4 to 5, which is a great starting point for testing.
When you notice issues, remember this rule: if the bobbin thread shows on top, your top tension is too tight, so you need to decrease the number on the dial (turn it counter-clockwise). If the needle thread shows underneath, your top tension is too loose, meaning you need to increase the number (turn it clockwise).
The key to successful adjustment is to make changes gradually and incrementally. Turn the dial by just a half or a full number at a time. After each adjustment, take a scrap piece of fabric (preferably the same type and thickness as your project) and sew a test seam. Examine the stitches carefully on both sides. Repeat this process, making small tweaks and testing until your stitches appear even and balanced, with the interlocking knot sitting perfectly within the fabric layers. This methodical approach will help you pinpoint the ideal setting for your specific project.
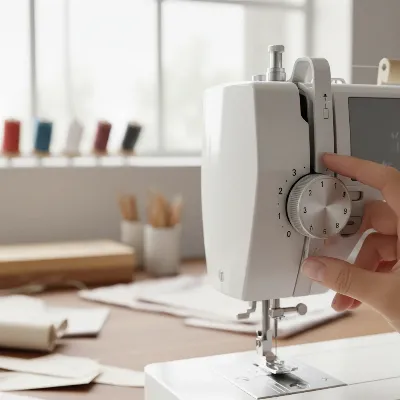 Close-up of a sewing machine's upper thread tension dial with numbered settings
When and How to Adjust Bobbin Thread Tension
While the upper thread tension is your primary control, there are instances where you might need to adjust the bobbin thread tension. However, this should generally be a last resort, as bobbin tension is often factory-set and rarely requires alteration for standard sewing. Most modern machines are designed for the bobbin tension to remain consistent, so focus on upper tension adjustments first.
If, after thoroughly adjusting your upper tension and performing all preliminary checks, you still experience issues, then it might be time to consider the bobbin tension. To adjust it, you’ll need to access the bobbin case. For machines with a removable bobbin case (common in front-loading models), take it out. For drop-in bobbins, you might need to remove the needle plate and bobbin cover.
Locate the tiny screw on the side of the bobbin case, usually on a small metal leaf spring. This screw controls the tension. Turning the screw clockwise (righty tighty) will tighten the bobbin tension, increasing the pressure on the thread. Turning it counter-clockwise (lefty loosey) will loosen the tension.
Just like with the upper tension, make very small adjustments – no more than a quarter turn at a time. A useful test for bobbin tension is the “bobbin drop test.” With the bobbin inserted into its case and the thread coming out, hold the thread tail. Give the thread a gentle tug or jiggle. If the case doesn’t move at all, it’s too tight. If it drops freely, it’s too loose. Ideally, the bobbin case should hang without dropping, then slide down slowly and smoothly with a slight jerk of the thread. Remember to test sew on scrap fabric after each minute adjustment until the stitches are balanced.
Advanced Tips for Perfect Tension
Achieving perfect sewing machine tension isn’t a set-it-and-forget-it task; it’s an ongoing dialogue with your machine and your materials. Different fabrics and thread weights will inherently demand different tension settings. For instance, delicate, lightweight fabrics might require a looser tension, while thick, heavy materials or specialty threads could necessitate a tighter setting to form a stable stitch. Always remember to perform test stitches on a scrap of your project fabric to fine-tune the tension before you begin sewing your actual garment or item.
 Hands sewing test stitches on scrap fabric to check sewing machine tension settings
Your machine’s user manual is an invaluable resource. It contains specific guidance on tension adjustment tailored to your model, often including recommended starting points for various stitch types or materials. Don’t be afraid to consult it regularly, especially when trying new techniques or troubleshooting persistent issues. By treating your sewing machine as a finely tuned instrument and paying attention to these details, you’ll not only achieve beautiful, balanced stitches but also deepen your understanding and enjoyment of the sewing process.
Conclusion
Mastering sewing machine tension is a fundamental skill that significantly impacts the quality and durability of your projects. From understanding the delicate balance between your top and bobbin threads to recognizing the tell-tale signs of incorrect tension, we’ve explored the essential steps to achieve flawless stitches. Remember to always start with basic checks like proper threading and a fresh needle, and approach tension adjustments with patience, making small, incremental changes followed by test sewing. With a bit of practice and attention to detail, you’ll soon be confidently adjusting your machine for any fabric or project. What new sewing adventures will you embark on now that you’ve unlocked the secret to perfect tension?
Frequently Asked Questions
How often should I adjust my sewing machine tension?
|
Our Picks for the Best Sewing Machine in 2026
As an Amazon Associate I earn from qualifying purchases.
|
||
| Num | Product | Action |
|---|---|---|
| 1 | Brother CS7000X Computerized Sewing and Quilting Machine, 70 Built-in Stitches, LCD Display, Wide Table, 10 Included Feet, White |

|
| 2 | Brother Sewing and Quilting Machine, XR3774, 37 Built-in Stitches, Wide Table, 8 Included Sewing Feet |
|
| 3 | SINGER Heavy Duty 4423 Meltwater Blue High Speed Sewing Machine with Accessory Kit | Strong Motor With Enhanced Piercing Power, 97 Stitch Applications, Full Metal frame, 1-step Buttonhole & LED Light |
|
| 4 | Brother RLX3817 17-Stitch Sewing Machine, White(Renewed) |
|
| 5 | Janome Cat Fancy Easy-to-Use Sewing Machine with Interior Metal Frame, Bobbin Diagram, Tutorial Videos, Made with Beginners in Mind!, Multi-Color |
|
| 6 | Brother SE700 Sewing and Embroidery Machine, Wireless LAN Connected, 135 Built-in Designs, 103 Built-in Stitches, Computerized, 4" x 4" Hoop Area, 3.7" Touchscreen Display, 8 Included Feet, White |
|
| 7 | SINGER Heavy Duty 4411 High-Speed Sewing Machine with Accessory Kit | Strong Motor, Enhanced Piercing Power, 69 Stitch Applications, Full Metal Frame, 4-Step Buttonhole & LED Light, Grey |
|
| 8 | SINGER Heavy Duty 4452 High-Speed Sewing Machine with Accessory Kit | Strong Motor with Enhanced Piercing Power, 110 Stitch Applications, Full Metal Frame, 1-Step Buttonhole & LED Lights, Grey |
|
| 9 | Brother XM2701 Sewing Machine, Lightweight, Full Featured, 27 Stitches, 6 Included Feet |
|
| 10 | Brother FB1757X Mechanical Sewing Machine |
|
You should adjust your sewing machine tension whenever you change fabric types, thread weights, or even the type of stitch you are using. Every project may require slightly different tension settings to achieve optimal stitch balance.
Can different threads affect tension settings?
Absolutely. Different thread materials and weights have varying friction and thickness, which directly impacts how they flow through the machine and between the tension discs. Always test tension when switching thread types to ensure balanced stitches.
Frequently Asked Questions
What are the main signs of incorrect sewing machine tension?
The main signs of incorrect sewing machine tension include loops or excess bobbin thread on the top of the fabric (top tension too tight), or needle thread visible on the underside (top tension too loose). Other indicators are fabric puckering, skipped stitches, or frequent thread breakage.
What should I check before adjusting my sewing machine's tension dial?
Before adjusting the tension dial, always re-thread your machine completely, inspect your needle for dullness or bends, ensure your bobbin is wound evenly and inserted correctly, and clean any lint from the tension discs. These steps often resolve issues without needing tension adjustments.
How do I adjust the upper thread tension on my sewing machine?
To adjust upper thread tension, locate the numbered dial (typically 0-9 or 1-10). Decrease the number (turn counter-clockwise) if the bobbin thread shows on top, or increase the number (turn clockwise) if the needle thread shows underneath. Make gradual adjustments, usually by a half or full number, and test on scrap fabric after each change.
When should I adjust the bobbin thread tension?
Adjust bobbin thread tension only as a last resort, after thoroughly checking and adjusting upper tension and performing all preliminary checks. Bobbin tension is often factory-set. If necessary, locate the small screw on the bobbin case; turn clockwise to tighten or counter-clockwise to loosen, making very small adjustments (no more than a quarter turn).
How often should I adjust my sewing machine tension?
You should adjust your sewing machine tension whenever you change fabric types, thread weights, or even the type of stitch you are using. Every project may require slightly different tension settings to achieve optimal stitch balance.
Can different threads affect tension settings?
Absolutely. Different thread materials and weights have varying friction and thickness, which directly impacts how they flow through the machine and between the tension discs. Always test tension when switching thread types to ensure balanced stitches.
Adjust Sewing Machine Tension for Perfect Stitches
Learn how to diagnose and adjust your sewing machine's upper and bobbin thread tension to achieve balanced, flawless stitches on any project.
Before adjusting tension, re-thread your machine, inspect your needle for damage, ensure the bobbin is wound evenly and inserted correctly, and clean any lint from the tension discs. Many stitch issues are resolved by these basic maintenance steps.
Locate the upper tension dial. If bobbin thread shows on top, decrease the number (turn counter-clockwise). If needle thread shows underneath, increase the number (turn clockwise). Make small, incremental adjustments (half to one number at a time).
After each tension adjustment, sew a test seam on a scrap piece of fabric identical to your project material. Examine both sides of the fabric to ensure stitches are even and the interlocking knot is perfectly within the fabric layers. Repeat adjustments and tests until balanced.
If upper tension adjustments don't resolve the issue, you may need to adjust bobbin tension. Access the bobbin case and locate the tiny screw. Turn clockwise to tighten or counter-clockwise to loosen, making very small adjustments (quarter turns) and performing the 'bobbin drop test' to check.

I found the information about the default tension setting being between 3 and 5 helpful, but I still had a bit of trouble getting my machine just right. I was hoping for a troubleshooting section that covered what to do if the adjustments don’t seem to be working. My thread still bunches a little on the underside, even after trying to fine-tune it. It’s a good starting point though.
I’ve always struggled with my stitches looking uneven, especially when switching between different fabric weights. This guide on adjusting the top and bobbin threads was a lifesaver! My stitches are finally looking perfectly balanced, and I’m not getting those annoying loose loops anymore. It really made a difference in my quilting projects.
The explanation of tension as a ‘tug-of-war’ really clicked for me. I used to just leave my machine on the default tension setting, but now I understand why it’s so important to adjust it for different threads. My only minor complaint is that I wish there were more specific examples for different fabric types, but overall, it’s a great resource.
This post completely demystified sewing machine tension for me! I used to dread changing fabrics because I knew my stitches would go haywire. Now, understanding how the top and bobbin threads interlock has made all the difference. My garments look so much more professional, and I’m not constantly re-sewing seams due to tangled threads.